Suspension Strap
Installation & Use:
Suspension Strap for Concept 2 Erg
Contents:
1 9” erg frame strap
1 28” erg handle strap
1 erg bracket
2 3/4” bolts
2 flat washers
1 square quick link ring
Installation:
Remove one of the bolts that attaches the erg’s front leg to the frame. (If you have difficulty removing these bolts, please refer to Concept 2’s site: https://www.concept2.com/service/indoor-rowers/model-d/troubleshooting/cant-loosen-four-front-leg-screws)
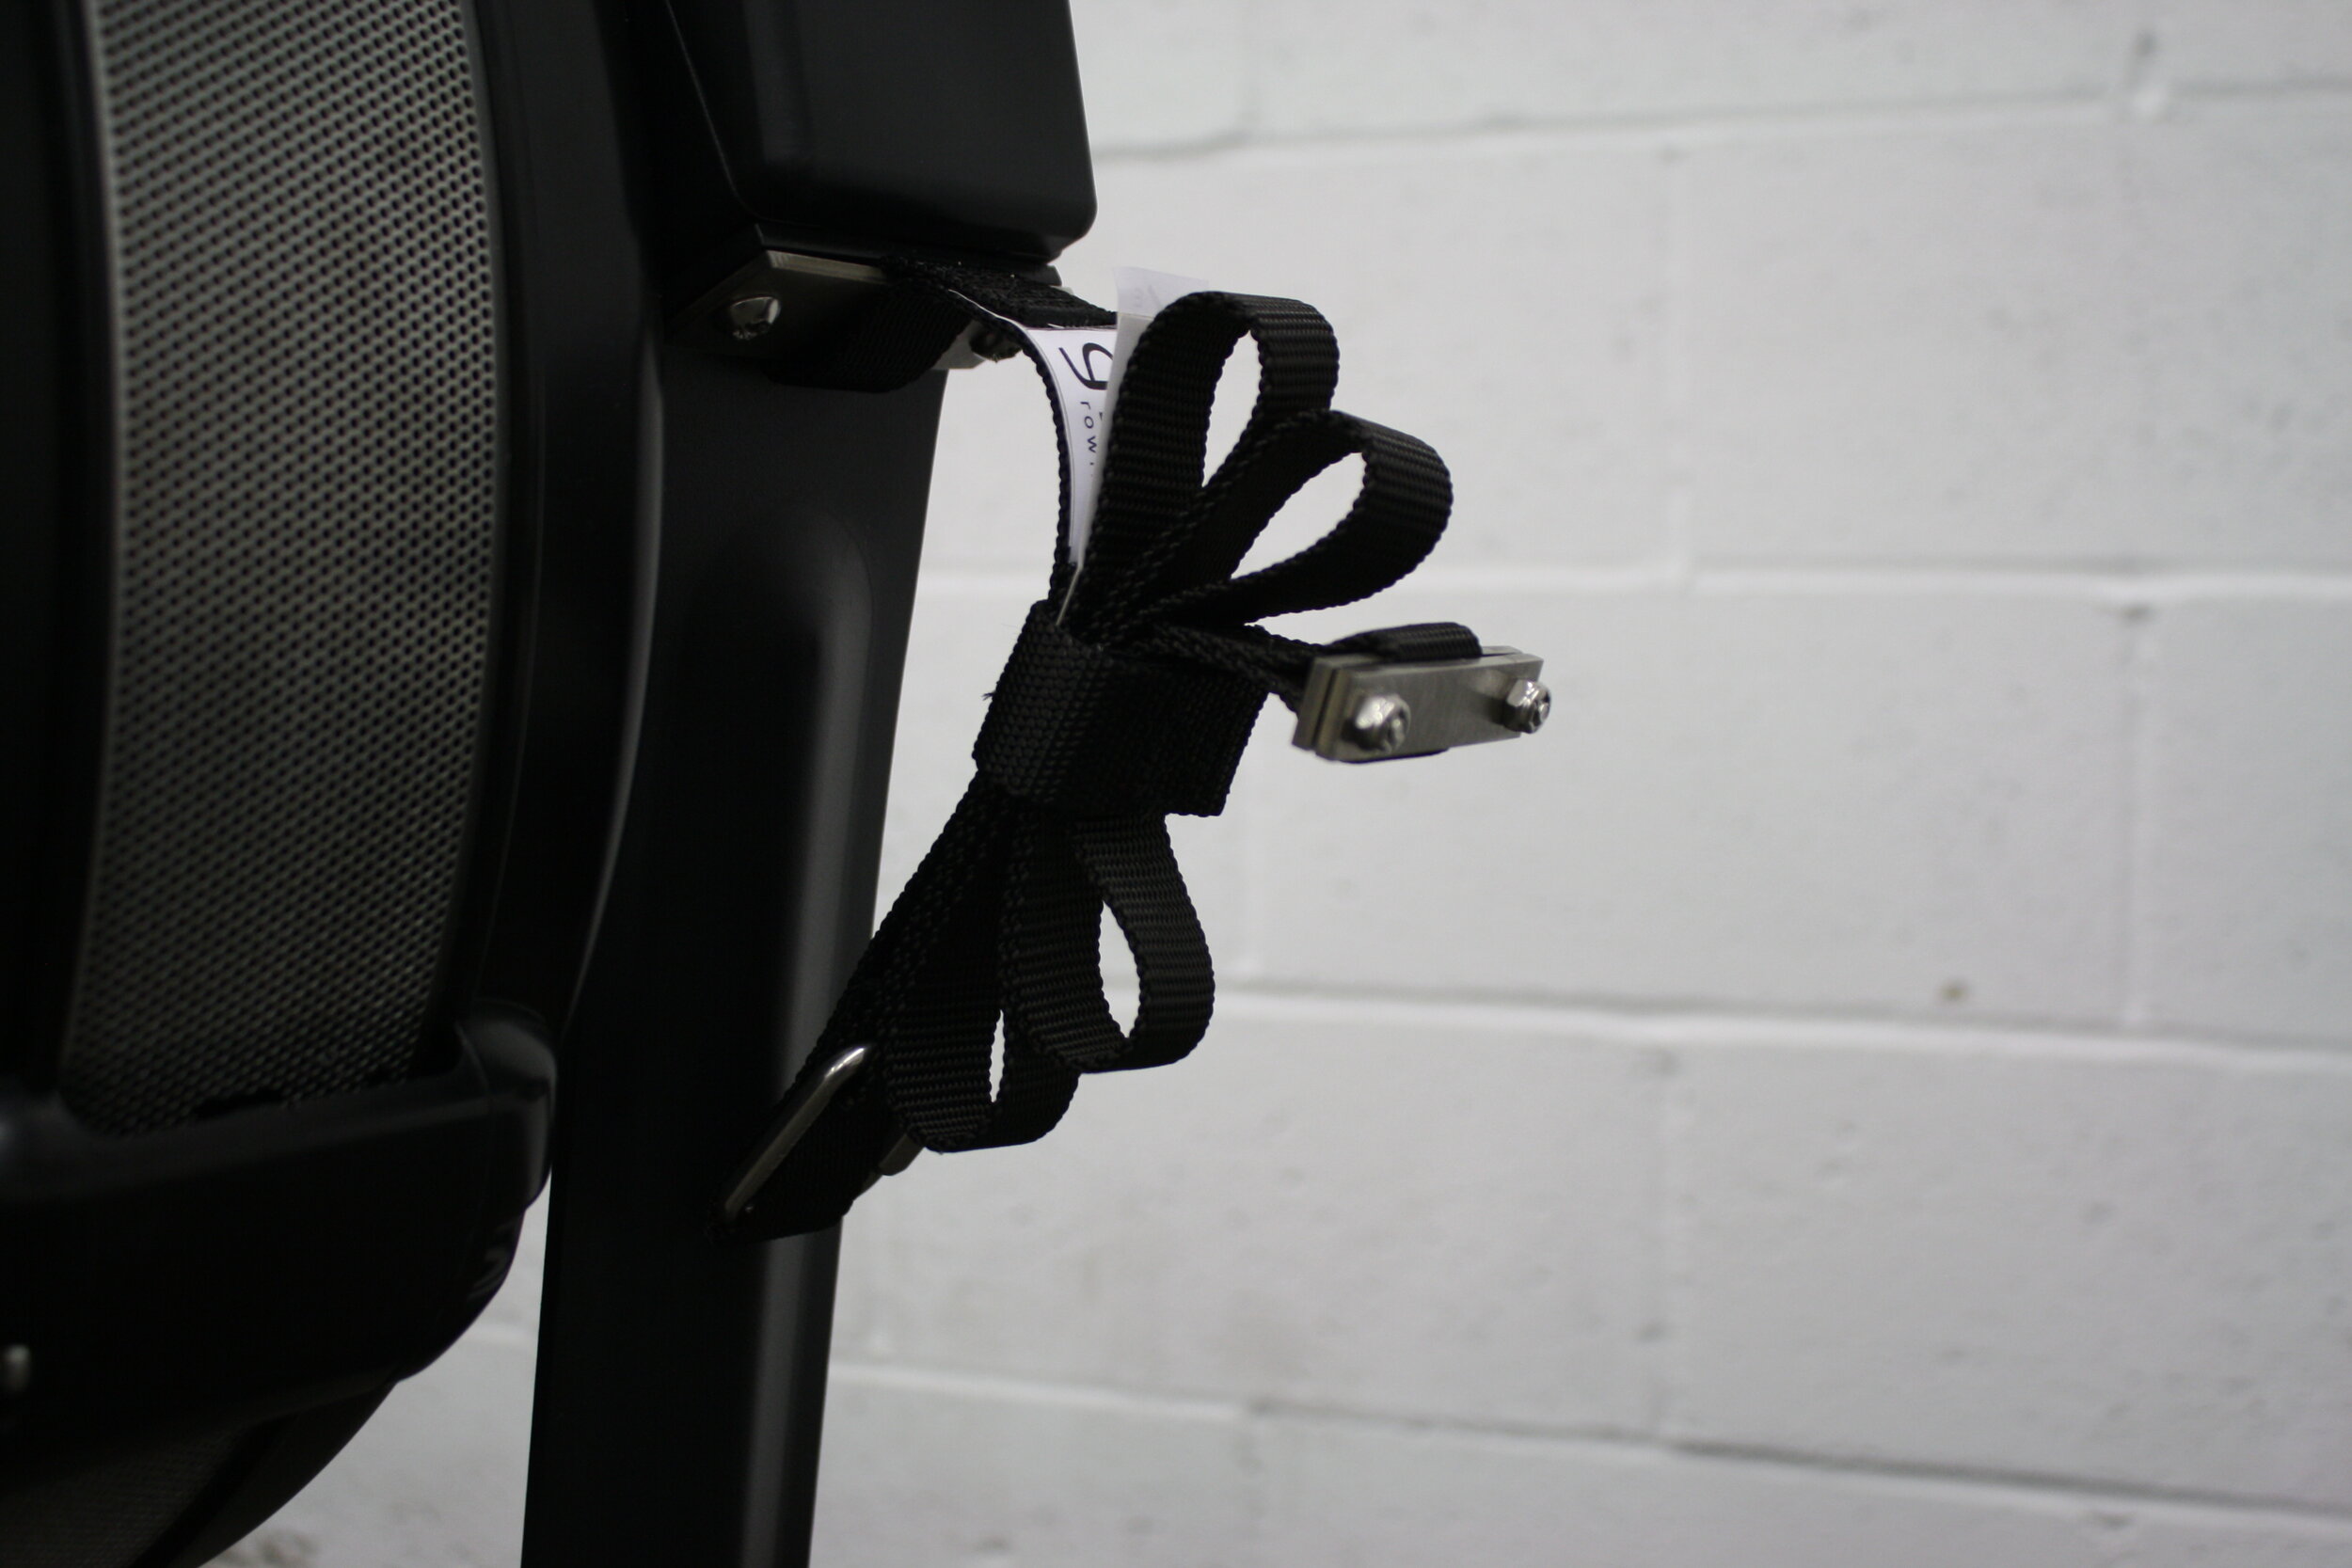
Slide one end of the erg strap on the bracket.
Insert one ¾” bolt, erg bracket with the flat washer between the erg frame and bracket. Tighten the bolt half way.
Remove the other bolt on the erg leg. Insert the other ¾” bolt and washer. Center the strap on the bracket and fully tighten both bolts.
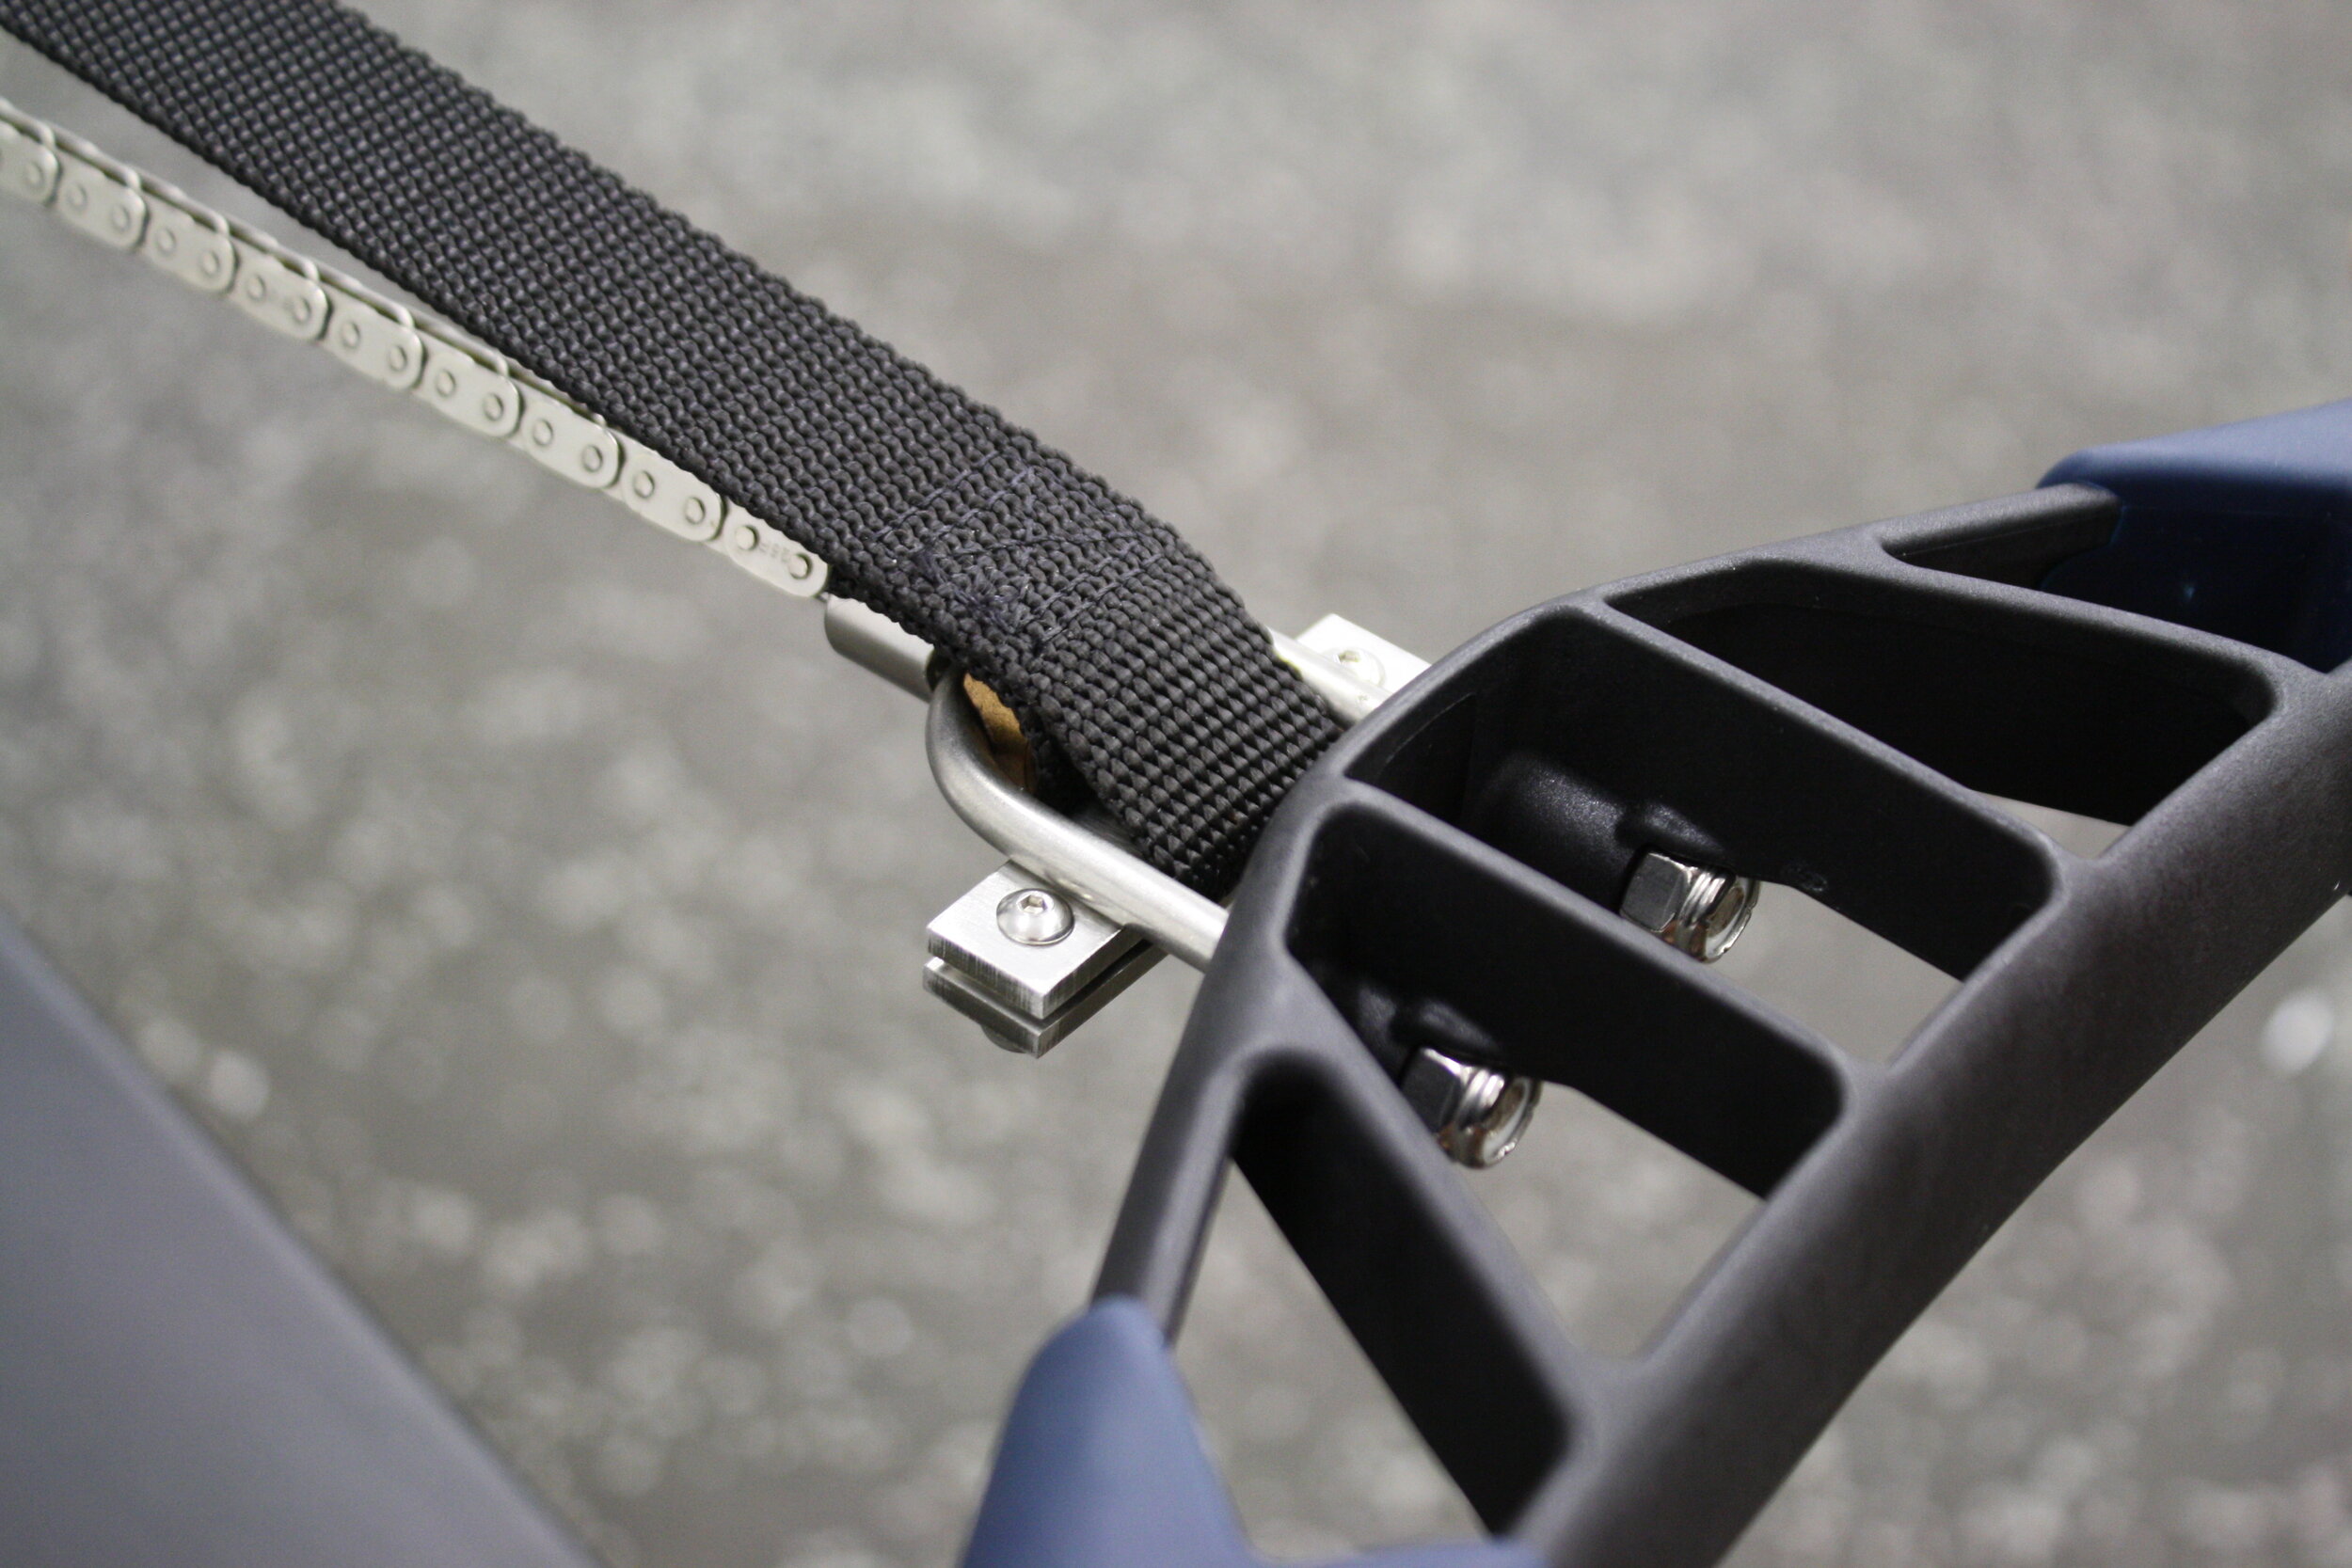
Slide the square quick link ring into the erg strap.
Attach the erg handle strap to the other end of the square quick link (see Use section below to determine which loop to use), tighten the nut on the ring.
Insert the erg handle bracket located on the other end of the erg handle strap into the metal U-bolt between the erg handle and swivel nut. Insert from the top so that when there is tension on the strap the bracket is flush across the bottom of the U-bolt.
Use:
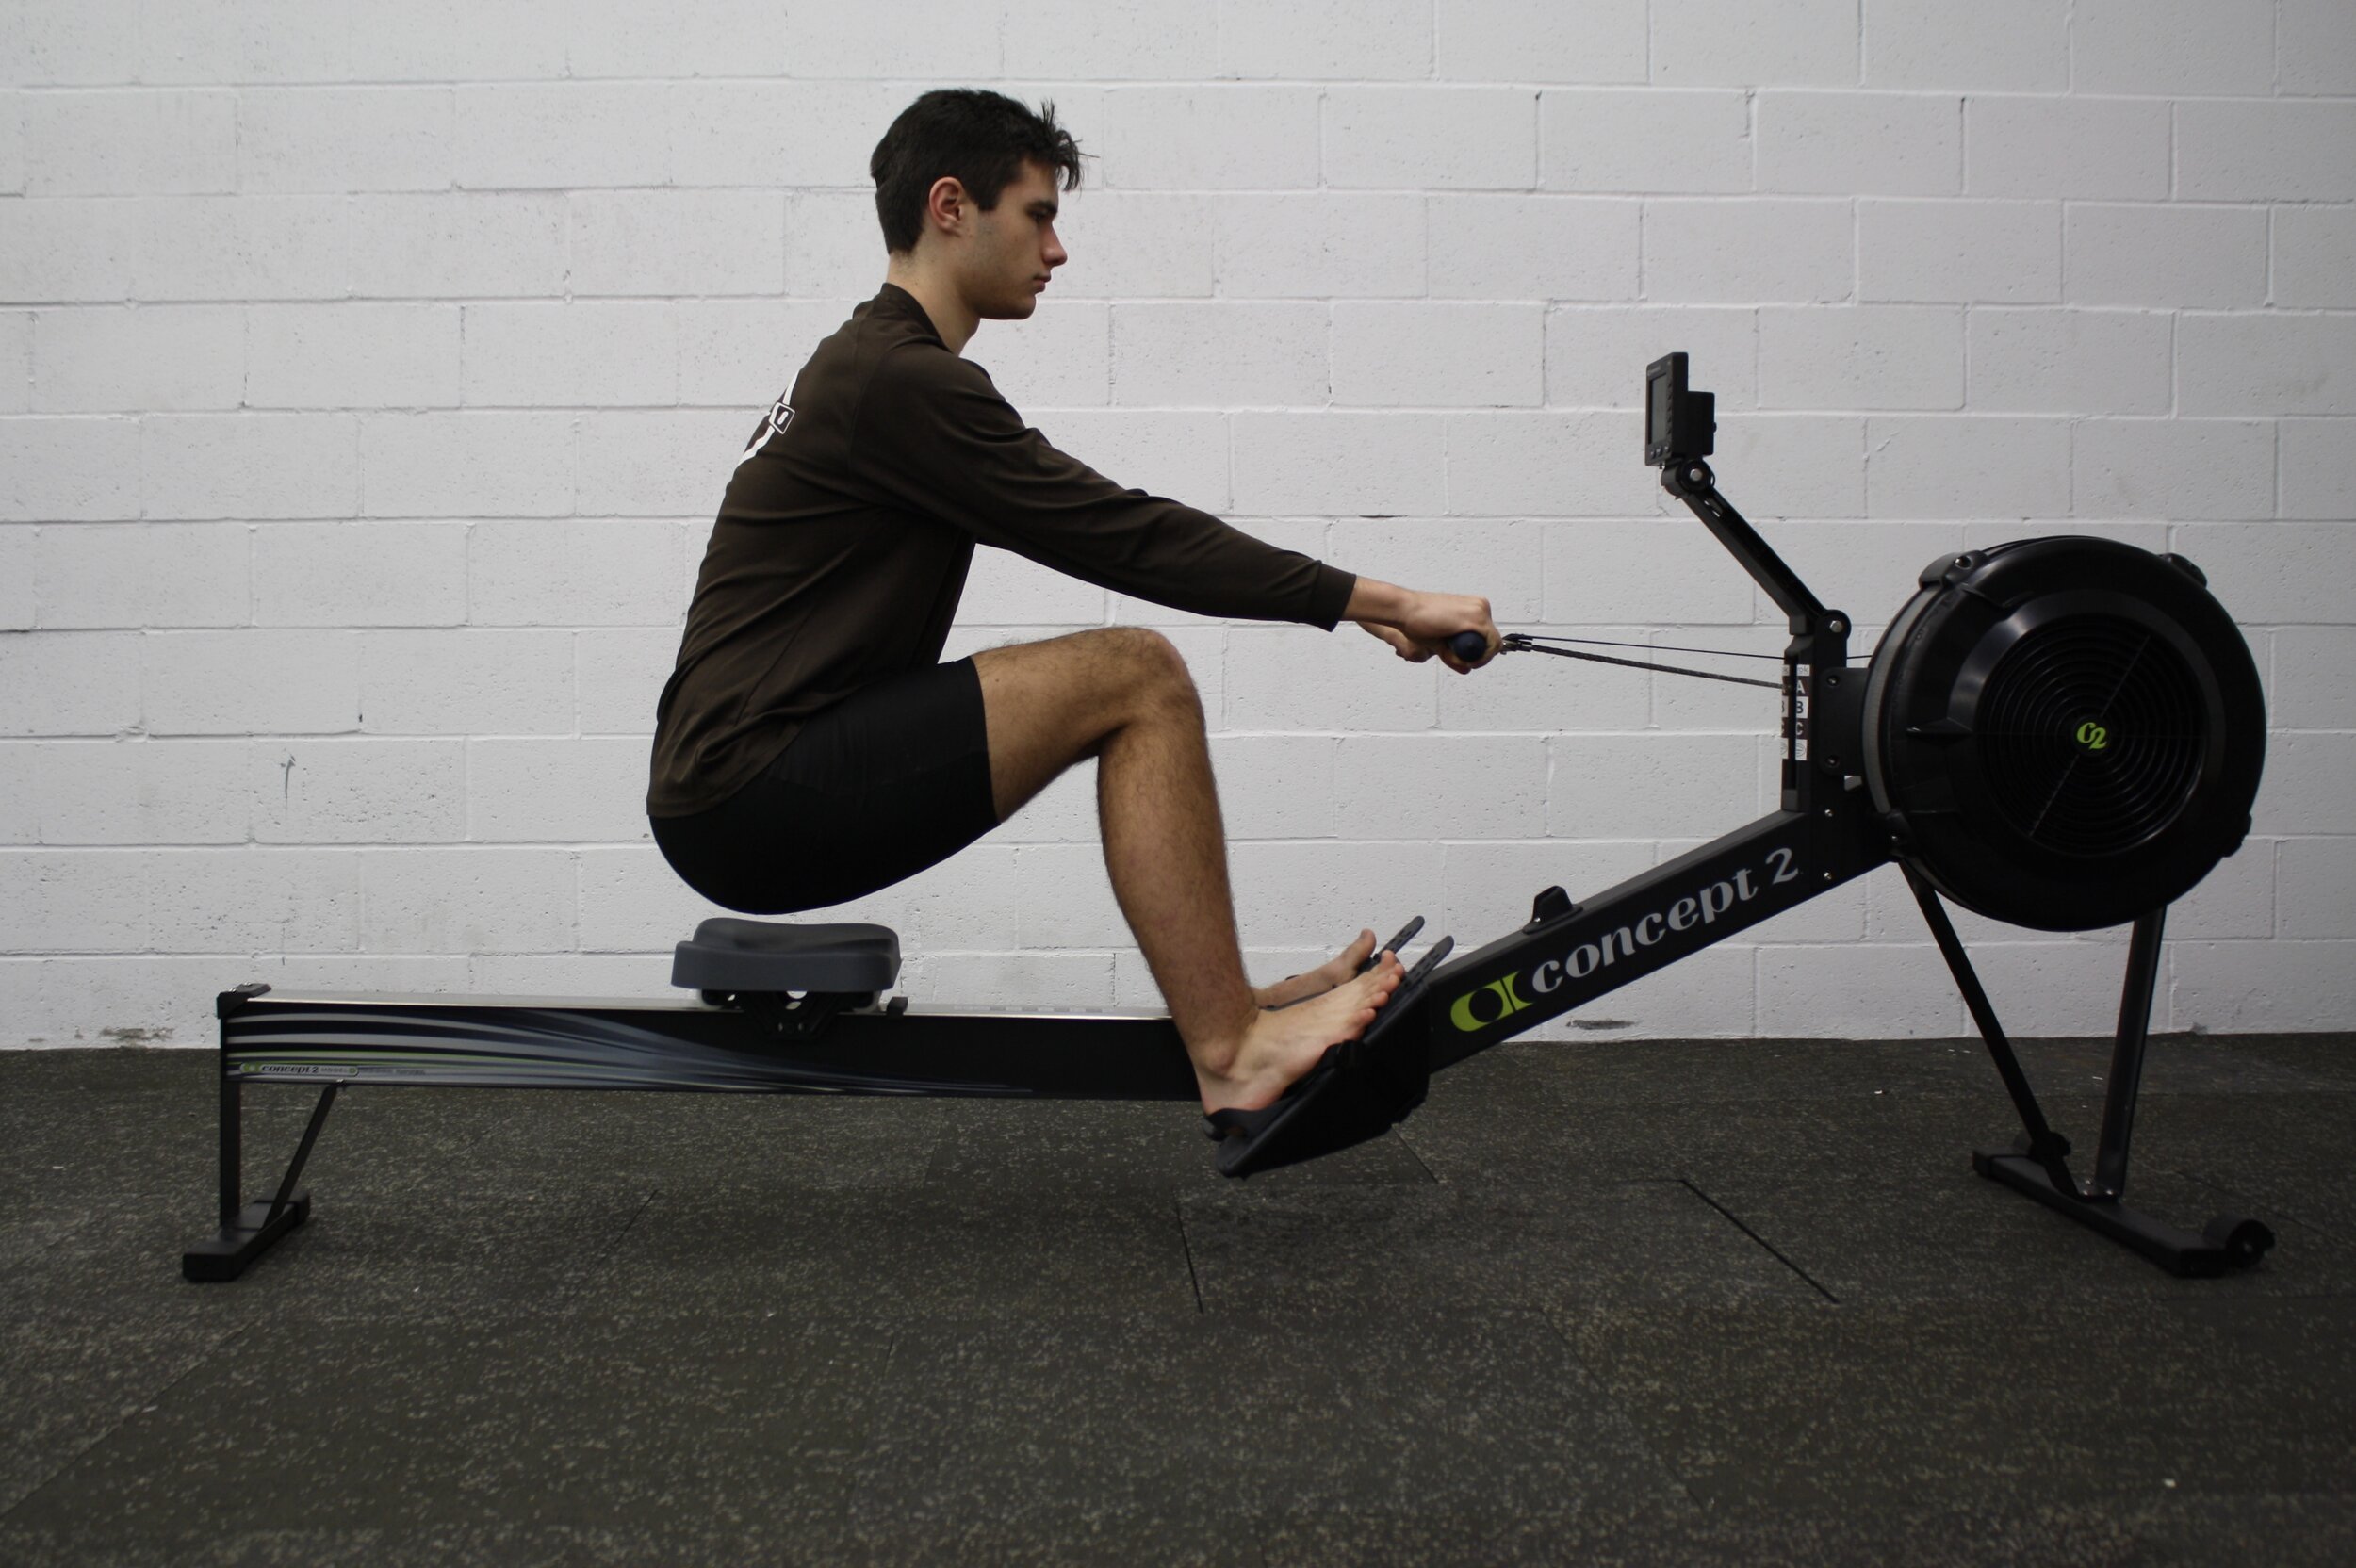
Have the athlete come to the desired catch position.
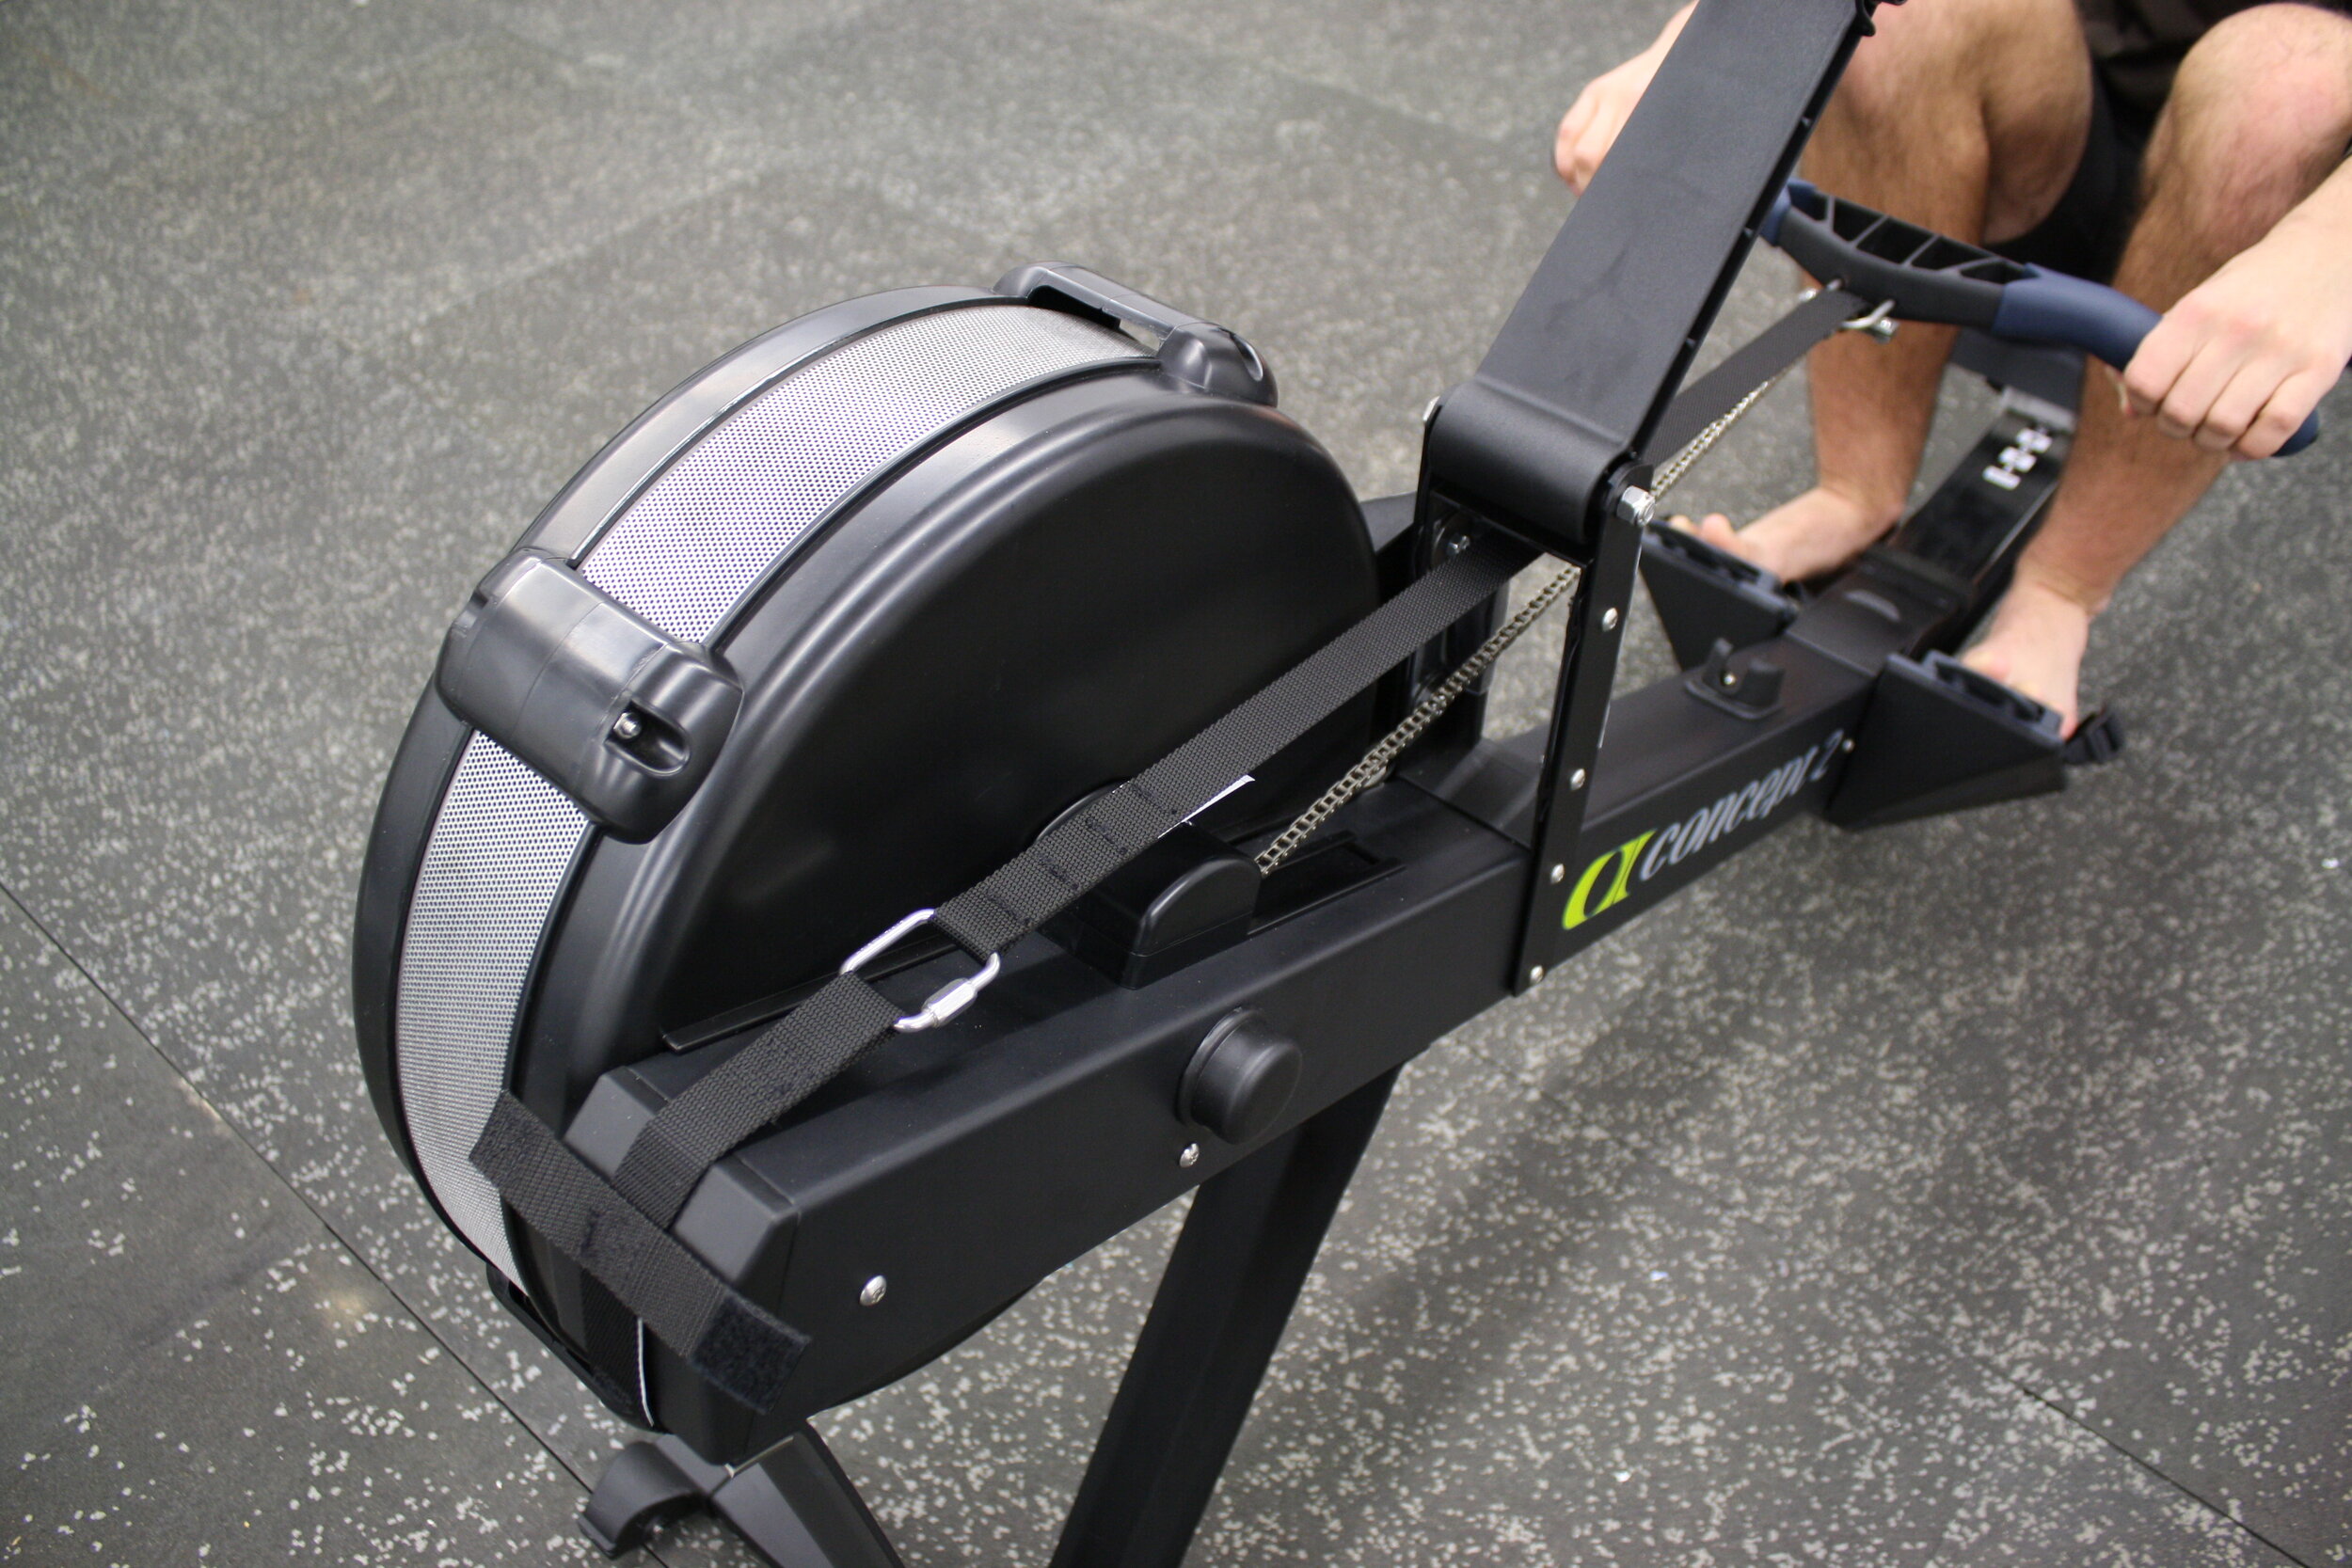
Wrap a bungee around the erg’s monorail to keep the seat in place during the exercise (the rubber stop in the C2 Erg Leg Compression Guide can also be used).
Wrap the erg handle strap around the end of the frame towards the rower. Adjust the erg handle strap to the athlete by selecting one of the four loops available on the other end of the strap. There should be no slack in the strap. Slide the square quick link ring into the appropriate loop. Tighten the ring.
Using their legs, the athlete SLOWLY pushes against the erg’s foot plate to “hang on the oar” (erg handle) and suspend their body over the seat one to two inches.
The athlete must relax their arms, and tighten their core and back muscles to lift themselves vertically.
Athletes new to the exercise should start by suspending themselves for only a couple of seconds, before returning to the erg seat. Repeat this exercise four to five times. As the athlete improves, they can suspend themselves for longer periods, do more reps, and perform maximum isometric contractions.
While doing isometrics exercises, the athlete should GRADUALLY increase force over the duration of the hold to maximum tension. Hold the position for no more than eight seconds with 10 to 15 seconds rest between reps. There should be no more than five reps per set. The total duration of isometric training (work and rest) should only be 10 minutes.
Light suspension exercises can be used as part of a warm-up routine. Maximum isometric reps can be used in a strength training program or circuit.
When finished with the exercise, remove the handle bracket and feed the strap through the erg’s chain guide. To keep the strap off the ground, fold the strap over itself several times and use the hook-and-loop fastener to hold the strap in place until it’s needed again.